🍞 No-Knead Gluten-Free Bread
Soft, Fluffy Inside • Lightly Crispy Crust • Beginner-Friendly
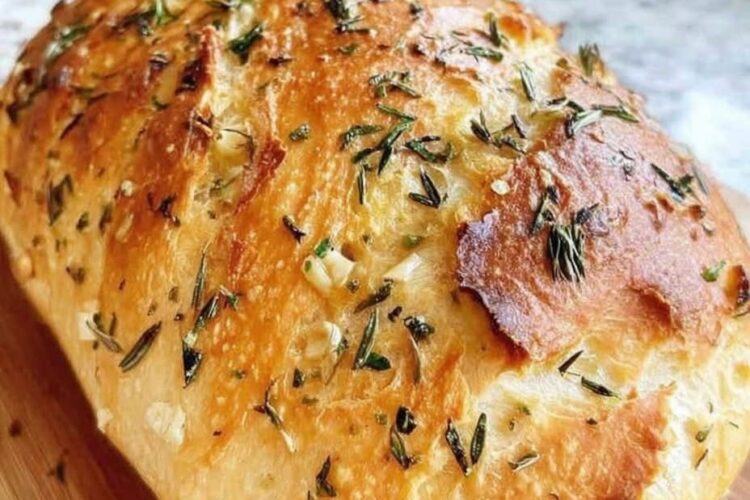
This no-knead gluten-free bread is the ultimate easy homemade bread recipe. It’s soft on the inside, lightly crispy on the outside, and doesn’t require any kneading, special tools, or prior baking experience. The dough is mixed in a single bowl, left to rise, and baked into a simple, delicious loaf that’s perfect for sandwiches, toast, or alongside your favorite meals.
Whether you’re new to gluten-free baking or just want a fast, foolproof bread, this recipe delivers every time.
⏱ Recipe Overview
- Prep Time: 10 minutes
- Rise Time: 45–60 minutes
- Bake Time: 40–45 minutes
- Total Time: About 1 hour 45 minutes
- Yield: 1 loaf
- Course: Bread / Breakfast / Snack
- Cuisine: American
- Calories: ~170 kcal per slice (based on 12 slices per loaf)
🌟 Why This Recipe Works
✔ No kneading required — just mix and rise
✔ One-bowl prep for minimal cleanup
✔ Uses simple, easy-to-find ingredients
✔ Soft interior and lightly crisp crust
✔ Perfect for beginners or busy home bakers
✔ Can be customized with herbs, seeds, or cheese
🧾 Ingredients
- 2½ cups gluten-free all-purpose flour (with xanthan gum)
- 1 tablespoon sugar or honey
- 1 teaspoon salt
- 2¼ teaspoons instant yeast
- 1 cup warm water (about 110°F / 43°C)
- 2 tablespoons olive oil
- 1 teaspoon apple cider vinegar
Optional Add-Ins:
- 1–2 teaspoons dried herbs (rosemary, thyme, oregano)
- 2 tablespoons seeds (sunflower, sesame, chia)
- ¼ cup grated cheese for savory bread
👩🍳 Step-by-Step Instructions
Step 1: Mix Dry Ingredients
In a large mixing bowl, combine:
- Gluten-free flour
- Sugar or honey
- Salt
- Instant yeast
Whisk or stir briefly to ensure even distribution.
Step 2: Add Wet Ingredients
Pour in:
- Warm water
- Olive oil
- Apple cider vinegar
Stir with a wooden spoon or spatula until a thick, sticky dough forms. The dough should be soft and slightly tacky but not dry.
Tip: Overmixing can make the bread dense, so stop once all ingredients are incorporated.
Step 3: Let the Dough Rise
Cover the bowl with a clean kitchen towel or plastic wrap.
Place in a warm, draft-free spot.
Let rise for 45–60 minutes, or until the dough looks puffy and slightly expanded.
Step 4: Prepare for Baking
Preheat the oven to 375°F (190°C).
Line a loaf pan with parchment paper or lightly grease it with oil.
Transfer the risen dough into the pan and gently smooth the top.
Step 5: Bake the Bread
Bake for 40–45 minutes, or until the top is firm and lightly golden brown.
The loaf should sound hollow when tapped lightly on top.
Step 6: Cool and Serve
Remove from the oven and allow the bread to cool completely in the pan.
Cooling is essential to prevent a gummy center.
Slice, serve, and enjoy warm or toasted.
Serving Suggestions:
- Toasted with butter or jam
- Sandwich bread for lunch
- Alongside soups, stews, or salads
- As a base for garlic bread
💡 Tips & Tricks for Perfect Bread
- Xanthan Gum: Ensure your gluten-free flour contains xanthan gum for proper structure.
- Warm Water: Use warm, not hot water to activate the yeast.
- Optional Flavors: Add herbs, seeds, or cheese for a twist on classic bread.
- Storage: Keep in an airtight container at room temperature for up to 3 days, or freeze for up to 1 month.
🥗 Nutrition Information (Per Slice – 12 slices per loaf)
| Nutrient | Amount |
|---|---|
| Calories | 170 kcal |
| Carbohydrates | 30 g |
| Protein | 3 g |
| Total Fat | 5 g |
| Saturated Fat | 0.7 g |
| Fiber | 2 g |
| Sugar | 2 g |
| Sodium | 220 mg |
| Cholesterol | 0 mg |
| Potassium | 90 mg |
| Calcium | 15 mg |
| Iron | 1 mg |
Values are approximate and may vary depending on ingredients and brand of flour used.
🧡 Final Thoughts
This no-knead gluten-free bread is proof that homemade gluten-free baking doesn’t have to be complicated. With minimal effort, one bowl, and no special skills, you get a loaf that’s soft, fluffy, and lightly crispy on the outside — perfect for everyday use.
It’s versatile, forgiving, and ideal for beginners or anyone who wants quick, satisfying gluten-free bread at home. Once you try it, you’ll find yourself making this loaf over and over!
