Chocolate Peanut Butter Crunch Bars – Recipe
Introduction & Background
No-Bake Chocolate Peanut Butter Crunch Bars are a masterclass in structural dessert design without thermal baking. They belong to a category of sweets that rely not on ovens or chemical leavening, but on fat solidification, mechanical compression, and controlled cooling to achieve their final form.
Historically, no-bake desserts emerged out of necessity—during hot summers, limited kitchen setups, or times when convenience was essential. Early versions were simple mixtures of pantry ingredients like crushed biscuits, sugar, butter, and cocoa. Over time, these humble beginnings evolved into highly refined recipes that mimic the complexity of baked desserts while maintaining ease of preparation.
This particular dessert stands out because it integrates three powerful sensory pillars:
- Deep chocolate richness
- Creamy, slightly salty peanut butter
- Crisp, crunchy texture contrast
The result is not just a quick treat—it is a layered eating experience that delivers satisfaction through contrast, balance, and structure.
Chef’s Philosophy & Advanced Culinary Thinking
The philosophy behind this dessert can be summarized as:
Structure replaces baking, and balance replaces complexity.
In baked goods, structure comes from:
- Heat-driven protein coagulation
- Starch gelatinization
- Air expansion
In this no-bake system, structure is created through:
- Fat cohesion (peanut butter + chocolate)
- Particle binding (coating dry ingredients)
- Compression (pressing into shape)
- Cooling (solidifying fats into stable matrix)
This recipe is not about simply mixing ingredients—it is about engineering a stable edible system that holds together while delivering contrasting textures.
A successful bar must achieve:
- Firmness without hardness
- Crunch without dryness
- Creaminess without greasiness
- Sweetness without overload
Core Culinary Systems (Ultra Deep Breakdown)
1. Fat-Based Binding & Matrix Formation System
At the heart of this dessert is a fat-binding matrix.
Peanut butter and chocolate serve as:
- Adhesive agents
- Structural stabilizers
- Flavor carriers
When warmed:
- Fats become fluid
- They coat dry particles evenly
- Fill microscopic gaps between ingredients
When cooled:
- Fats solidify
- Lock ingredients into place
- Create sliceable structure
This process replaces the need for baking entirely.
2. Mechanical Crunch & Structural Integrity System
Crunch elements are not just for texture—they are essential for structure.
Common choices include:
- Rice cereal
- Cornflakes
- Crushed biscuits
- Toasted oats
These provide:
- Internal scaffolding
- Resistance to compression
- Bite contrast
Without this system, the bars would become dense, overly soft, and less satisfying.
3. Sweet-Salty Flavor Calibration System
One of the defining features of this dessert is its sweet-salty interplay.
Chocolate provides:
- Deep sweetness
- Slight bitterness (especially dark chocolate)
Peanut butter provides:
- Natural saltiness
- Roasted nut depth
A pinch of added salt enhances:
- Flavor clarity
- Complexity
- Overall balance
Without proper calibration, the dessert becomes one-dimensional.
4. Layer Separation & Sensory Zoning System
These bars are typically built in layers to create distinct sensory zones:
- Bottom: crunchy peanut butter base
- Top: smooth chocolate coating
This separation allows:
- Different textures in each bite
- Controlled flavor release
- Visual contrast
Layering transforms the dessert from simple to sophisticated.
5. Cooling Dynamics & Solidification System
Cooling is not just a final step—it is a critical structural phase.
During refrigeration:
- Fats crystallize and harden
- Binding strength increases
- Layers stabilize
Improper cooling leads to:
- Bars falling apart
- Uneven texture
- Sticky or greasy finish
Controlled chilling ensures clean slicing and ideal bite.
6. Compression Physics & Density Control System
Pressing the mixture into the pan is not just for shaping—it directly affects texture.
Proper compression:
- Eliminates air gaps
- Increases structural integrity
- Ensures even density
Too little pressure → crumbly bars
Too much pressure → overly dense texture
The goal is firm but not compacted.
Difficulty, Timing & Yield
Difficulty Level: Easy (Technique-focused rather than skill-heavy)
Preparation Time: 20–25 minutes
Chilling Time: 1.5–2.5 hours
Total Time: ~2.5–3 hours
Servings: 12–20 bars depending on size
Ingredients (Ultra Detailed Functional Breakdown)
Crunch Base System
- 2 to 2.5 cups cereal (rice cereal, cornflakes) OR crushed biscuits
Function:
- Provides structural skeleton
- Adds crisp texture
- Prevents overly dense consistency
Primary Binding System
- 1 cup peanut butter
Function:
- Core structural binder
- Adds creaminess and richness
- Holds ingredients together
Secondary Binding & Sweetness System
- 1/2 to 2/3 cup honey, maple syrup, or corn syrup
Function:
- Enhances binding strength
- Adds sweetness
- Improves chewiness
Fat Enrichment System (Optional but Recommended)
- 1/4 cup butter
Function:
- Improves mouthfeel
- Adds richness
- Enhances smoothness
Chocolate Top Layer System
- 1 to 1.5 cups chocolate chips
Function:
- Creates firm top layer
- Adds rich flavor
- Provides structural seal
Flavor Enhancement System
- 1 teaspoon vanilla extract
- Pinch of salt
Function:
- Enhances aroma
- Balances sweetness
- Deepens overall flavor
Step-by-Step Method (Ultra Detailed Execution System)
Step 1: Preparation & Setup Phase
Line a baking pan with parchment paper.
This ensures:
- Easy removal
- Clean slicing
- Prevents sticking
Step 2: Crunch Base Calibration Phase
Place cereal or crushed biscuits in a large bowl.
Ensure:
- Even size pieces
- No overly large chunks
This ensures consistent texture.
Step 3: Binding Mixture Formation Phase
In a saucepan:
- Combine peanut butter, honey, and butter
Heat gently until smooth and fully combined.
Do not boil.
This creates the liquid binding system.
Step 4: Integration & Coating Phase
Pour warm mixture over crunch base.
Mix thoroughly until every piece is coated.
This step determines:
- Structural consistency
- Even flavor distribution
Step 5: Compression & Structuring Phase
Transfer mixture into prepared pan.
Press firmly using spatula or hands.
Ensure:
- Even thickness
- No loose areas
- Smooth surface
Step 6: Chocolate Layer Formation Phase
Melt chocolate slowly using:
- Microwave (short intervals)
OR - Double boiler
Pour over base and spread evenly.
Step 7: Cooling & Solidification Phase
Refrigerate for 1.5–2.5 hours.
During this time:
- Chocolate hardens
- Base firms up
- Structure stabilizes
Step 8: Cutting & Finishing Phase
Remove from pan.
Slice into bars using sharp knife.
For clean cuts:
- Slightly warm knife
- Wipe between cuts
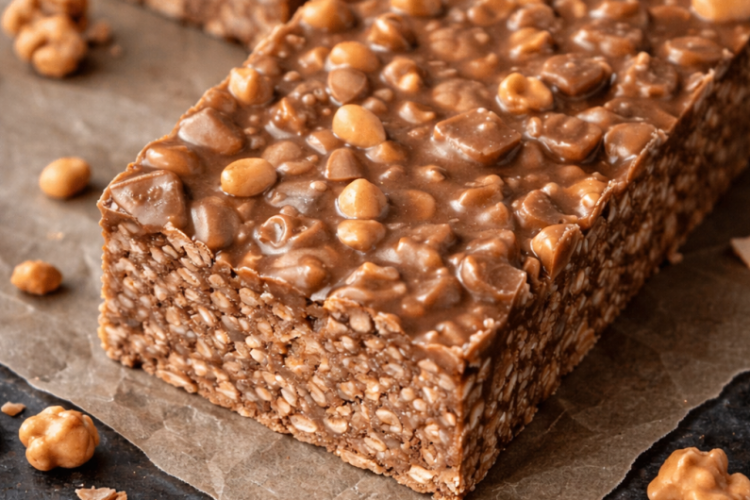
Texture & Flavor Profile (Professional Analysis)
A perfectly executed bar delivers:
- Crisp crunch from base
- Creamy peanut butter binding
- Firm chocolate top with slight snap
- Balanced sweet-salty profile
- Slight chew combined with crunch
The eating experience should feel dynamic, not uniform.
Advanced Variations & Extensions
High Protein Version
- Add protein powder to base
- Slightly increase liquid for balance
Creates a functional snack bar.
Layered Caramel Version
- Add caramel layer between base and chocolate
Adds depth and richness.
Nut-Loaded Version
- Add chopped almonds, peanuts, or cashews
Enhances crunch and complexity.
Dark Chocolate Intense Version
- Use 70–85% dark chocolate
Reduces sweetness and increases depth.
Coconut Crunch Version
- Add shredded coconut
Adds tropical flavor and texture.
Advanced Tips for Perfection
- Use high-quality chocolate for better flavor
- Do not overheat peanut butter mixture
- Press evenly for consistent structure
- Add salt even if peanut butter is salted
- Chill completely before slicing
Common Mistakes & Detailed Fixes
Bars Falling Apart
Cause:
Insufficient binding or poor compression
Fix:
Increase peanut butter or press more firmly
Greasy Texture
Cause:
Excess fat or poor ingredient balance
Fix:
Reduce butter or adjust ratios
Too Hard to Bite
Cause:
Excess chocolate or over-chilling
Fix:
Let sit at room temperature before serving
Uneven Layers
Cause:
Poor spreading technique
Fix:
Use spatula and level carefully
Storage & Shelf Life Optimization
- Refrigerate up to 7–10 days
- Freeze up to 1–2 months
- Store in airtight container
- Separate layers with parchment if stacking
Serving & Presentation Ideas
- Cut into bars, squares, or bite-size cubes
- Drizzle extra chocolate for visual appeal
- Sprinkle sea salt on top for contrast
- Serve slightly chilled or at room temperature
Final Thoughts
No-Bake Chocolate Peanut Butter Crunch Bars are a powerful example of how desserts can be built through engineering principles rather than traditional baking techniques.
They deliver:
- Rich chocolate indulgence
- Creamy peanut butter depth
- Satisfying crunch contrast
- Simple preparation with complex results
At their core, they prove a key culinary insight:
When structure, texture, and flavor are properly balanced, even the simplest ingredients can create something deeply satisfying and technically impressive—without ever turning on the oven.
