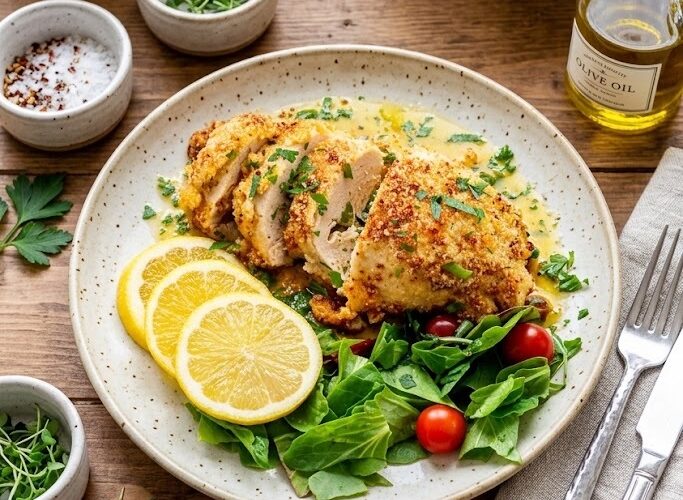
Keto Chicken Kiev is a rich, satisfying chicken dinner made with tender chicken breasts, a flavorful garlic-herb butter center, and a crisp almond flour and Parmesan coating. It is an excellent choice when you want a low-carb chicken recipe that feels special enough for entertaining but is still practical for a family dinner.
The combination of juicy chicken, melted seasoned butter, Parmesan, and fresh parsley creates a comforting meal with plenty of flavor in every bite.
Unlike traditional Chicken Kiev, which is usually prepared with breadcrumbs, this keto-friendly version uses finely ground almond flour and grated Parmesan to create a golden coating without adding a traditional breadcrumb crust.
The result is a delicious gluten-free and low-carb chicken recipe that fits comfortably into a keto meal plan. It can be prepared in an air fryer or baked in the oven, giving you flexibility depending on the equipment and cooking method you prefer.
Why This Keto Chicken Recipe Works
The best part of this recipe is the contrast between the crispy outside and the buttery center. The seasoned butter is prepared with fresh parsley, minced garlic, sea salt, and black pepper before being chilled until firm. Once enclosed inside the chicken breast, the butter melts during cooking and helps keep the meat flavorful and moist. When the chicken is sliced open, the garlic butter creates the classic Chicken Kiev effect that makes this dish so appealing.
The almond flour and Parmesan coating adds another layer of flavor and texture. Almond flour provides the foundation for a crisp, nutty coating, while Parmesan contributes a savory, cheesy taste and helps the exterior develop a pleasant golden finish. A small amount of cayenne pepper adds subtle heat without overpowering the garlic and herb flavors. Together, these ingredients make the chicken much more interesting than an ordinary baked chicken breast.
What Makes It Keto Friendly
This recipe is designed around ingredients that are naturally low in carbohydrates. Instead of wheat-based breadcrumbs, the chicken is coated with finely ground almond flour and Parmesan cheese. The butter, chicken, eggs, parsley, garlic, and seasonings also contribute to a meal that is relatively low in carbohydrates compared with traditional breaded chicken dishes.
According to the nutrition information provided for the recipe, one serving contains approximately 2.98 grams of carbohydrates and 1.19 grams of fiber. That makes the recipe particularly suitable for people following a low-carb eating pattern. However, individual nutritional values can vary depending on the exact brands and ingredients used, so anyone following a strict ketogenic diet should calculate nutrition using their own products when precision is important.
Ingredients That Give the Dish Its Flavor
The seasoned butter is the heart of this Keto Chicken Kiev. Softened salted butter is combined with fresh parsley, minced garlic, sea salt, and ground black pepper. Chilling this mixture before using it is important because firm butter is much easier to place inside the chicken and seal. As the chicken cooks, the butter gradually melts, creating a flavorful center.
Boneless chicken breast works well because it can be flattened into thin pieces and rolled around the butter. Pounding the chicken to approximately one-quarter inch thick makes the meat easier to shape and helps it cook more evenly. Using chicken breasts of similar size is also helpful because it promotes more consistent cooking across all portions.
The coating uses finely ground almond flour, grated Parmesan cheese, and cayenne pepper. Almond flour is a popular ingredient in keto cooking because it can replace traditional flour or breadcrumbs in many recipes. Parmesan adds savory depth and helps the exterior become pleasantly crisp. The beaten eggs act as the binding layer, allowing the almond flour mixture to adhere securely to the chicken.
How to Prepare the Garlic Butter
Start by combining the softened salted butter with chopped fresh parsley, minced garlic, sea salt, and ground black pepper in a medium bowl. Mix everything thoroughly so the garlic and herbs are distributed throughout the butter rather than concentrated in one area. Once combined, shape the mixture into a compact log.
Wrap the butter log tightly in parchment paper, waxed paper, or plastic wrap and place it in the refrigerator for at least two hours. The goal is to make the butter firm enough to handle. Chilled butter is easier to divide and position inside the chicken without spreading across the meat or becoming difficult to seal.
This step can also be completed ahead of time. Preparing the butter mixture earlier in the day or the night before can make the final cooking process easier. Keeping the butter cold until it is needed helps maintain the shape of the Chicken Kiev during assembly.
Preparing the Chicken Breasts
Place the chicken breasts inside a zip-top bag and use a meat mallet to pound them until they are approximately one-quarter inch thick. Pounding the chicken evenly is important because very thick areas can take longer to cook, while very thin sections may cook too quickly.
Work carefully with the meat mallet rather than striking aggressively. The goal is to create a thin, even piece of chicken that can be folded and wrapped around the butter. If the chicken has particularly thick sections, flatten those areas gradually until the breast is reasonably uniform.
Once the chicken has been flattened, place a portion of the chilled seasoned butter in the center. Roll the chicken tightly from the long side while tucking the short sides inward as you go. This creates a sealed package around the butter. Secure the chicken with toothpicks so that the roll remains closed while it is being coated and cooked.
Why Chilling the Chicken Matters
After the chicken is wrapped around the butter, it should be wrapped tightly in plastic wrap and refrigerated for at least two hours or overnight. This second chilling period helps the chicken maintain its shape and gives the butter time to remain firm before cooking.
Skipping this stage can make the chicken more difficult to handle. Cold, firmly wrapped chicken is easier to coat because the butter is less likely to escape during preparation. It also gives the assembled Chicken Kiev a more stable shape before it goes into the air fryer or oven.
If you are preparing this meal for a dinner party or family gathering, this make-ahead feature can be especially useful. The chicken can be assembled ahead of time and refrigerated, allowing you to focus on cooking and serving when mealtime arrives.
Creating the Keto Coating
For the coating, combine the finely ground almond flour, grated Parmesan cheese, and cayenne pepper in a shallow bowl. In a separate bowl, beat the eggs until they are well combined. Keeping the wet and dry mixtures separate makes the coating process easier and helps prevent unnecessary mess.
Take each chilled chicken roll and dip it into the beaten egg. Make sure the surface is coated before transferring it to the almond flour mixture. Press the coating onto the chicken with your fingers so it adheres well. This extra pressure helps create a more complete crust and reduces the chance of bare patches.
The Parmesan and almond flour combination provides a useful alternative to conventional breadcrumbs. It adds texture without relying on wheat flour and complements the buttery garlic center particularly well. The cayenne pepper brings a gentle spicy note that can be adjusted only if the recipe is being modified, but the original ingredient quantities should remain unchanged for this version.
Air Fryer Keto Chicken Kiev
The air fryer is a convenient option when you want a relatively quick cooking method and a nicely browned exterior. Set the air fryer to 350°F. If desired, place an air fryer liner inside the basket to help prevent sticking. Lightly spray the prepared chicken with oil before cooking.
Cook the chicken for approximately 20 minutes, or until an instant-read thermometer registers 160°F. Cooking time can vary somewhat depending on the size and thickness of the chicken rolls and the performance of the particular air fryer. For food safety, use the thermometer rather than relying only on appearance.
Once the chicken has reached the required temperature, remove it from the air fryer and allow it to rest for five to ten minutes before serving. Resting gives the meat time to settle and allows the hot garlic butter inside to become slightly less aggressive when the chicken is cut.
Oven-Baked Keto Chicken Kiev
For an oven-baked version, preheat the oven to 375°F. Line a baking sheet with parchment paper and spray it with cooking spray. Arrange the coated chicken on the prepared baking sheet and lightly spray the outside with oil.
Bake for approximately 40 to 45 minutes, or until an instant-read thermometer registers 160°F. Because chicken breasts can vary considerably in size, use the internal temperature as the most reliable indicator of doneness rather than depending entirely on the cooking time.
After baking, allow the chicken to rest for five to ten minutes. This short resting period makes the chicken easier to slice and serve. It also gives the melted butter inside the roll a chance to settle, helping preserve some of the classic garlic-butter presentation associated with Chicken Kiev.
How to Serve Keto Chicken Kiev
Keto Chicken Kiev is substantial enough to serve as the centerpiece of a dinner. Because the chicken already contains butter, Parmesan, almond flour, and a flavorful garlic-herb filling, it pairs particularly well with lighter vegetable-based side dishes. A simple green salad, roasted vegetables, steamed broccoli, or sautéed low-carb vegetables can provide balance.
For a more comforting keto dinner, serve the chicken with cauliflower-based sides or another vegetable dish that complements the garlic and Parmesan flavors. Fresh herbs can also be used as a simple finishing touch when serving, especially if you want the plate to look more polished for a special occasion.
When cutting into the chicken, take care because the center can contain hot melted butter. Allowing the cooked chicken to rest before slicing is helpful for both texture and serving. Cutting each portion cleanly also reveals the flavorful center, making this dish especially attractive when presented at the table.
Helpful Preparation Notes
One of the most important details is keeping the seasoned butter cold. Soft butter is easy to mix, but it becomes difficult to control once it is placed inside thin chicken. Refrigeration solves this problem by turning the butter into a firm log that can be handled more easily.
Another important step is securing the chicken properly. Tucking the short ends inward while rolling the breast from the long side helps create a sealed package. Toothpicks provide additional support and help prevent the roll from opening during cooking. Remember to remove all toothpicks before serving.
Do not judge doneness solely by the color of the coating. The outside may brown before the center of the chicken reaches the desired temperature. An instant-read thermometer provides a much more dependable way to check the chicken. The recipe specifies cooking until the thermometer registers 160°F, followed by a resting period.
Make-Ahead Preparation
This recipe works well as a make-ahead dinner because both the seasoned butter and assembled chicken require refrigeration. The butter can be prepared and chilled before you begin working with the chicken. After the chicken is filled, rolled, secured, and coated, it can also be refrigerated before cooking.
Preparing the components ahead of time can make the recipe less stressful when you are cooking for guests. Instead of completing every step immediately before dinner, you can organize the preparation earlier and focus on cooking the chicken when you are ready to eat.
If you prepare the chicken the night before, keep it refrigerated and properly covered. Before cooking, arrange the portions so they have enough space around them for the chosen cooking method. Avoid overcrowding the air fryer basket because adequate airflow helps promote more even cooking.
Keto Chicken Kiev for Family Dinner
Although Chicken Kiev has a special-occasion reputation, this keto version can easily become part of a regular dinner rotation. The familiar combination of chicken, garlic, butter, and Parmesan appeals to a wide range of tastes, while the almond flour coating gives it the texture people often expect from breaded chicken.
It is also a useful option when you are trying to reduce traditional carbohydrates without giving up satisfying comfort food. Instead of serving plain chicken repeatedly, stuffing the meat with seasoned butter and adding a crisp coating creates a much more memorable meal.
For families, the individual portions make serving straightforward. Each chicken breast can be prepared separately and served alongside vegetables or another preferred low-carb side. The rich flavor means that you do not need a complicated sauce or elaborate garnish to make the meal feel complete.
Notes for the Best Results
Keep the butter chilled until it is time to fill the chicken, and refrigerate the assembled chicken before coating and cooking. Pound the chicken evenly so the portions have a consistent thickness. When rolling, tuck the ends securely and use toothpicks to hold the shape. Press the almond flour and Parmesan mixture firmly onto the egg-coated chicken for better coverage.
An instant-read thermometer is particularly useful for this recipe. Chicken should be cooked safely and checked at the thickest portion. Because air fryers and ovens can vary, the stated cooking times should be treated as a guide while the internal temperature should be used as the final check.
Finally, allow the cooked Chicken Kiev to rest for five to ten minutes before serving. This makes the chicken easier to handle and gives the hot garlic butter inside time to settle. Always remove toothpicks before eating, and take care when cutting into the center because the butter filling can remain very hot.
Frequently Asked Questions
Is Chicken Kiev keto friendly?
This version is designed as a low-carb and keto-friendly Chicken Kiev because it uses almond flour and Parmesan instead of conventional breadcrumbs. The provided nutritional information lists approximately 2.98 grams of carbohydrates and 1.19 grams of fiber per serving. As always, people following a strict keto plan should verify nutrition according to their specific ingredients and serving sizes.
Can I make Keto Chicken Kiev in an air fryer?
Yes. The provided air-fryer method uses a temperature of 350°F and a cooking time of about 20 minutes. The chicken should be checked with an instant-read thermometer and cooked until it reaches 160°F according to the supplied recipe instructions. Let it rest for five to ten minutes before serving.
Can I bake Keto Chicken Kiev instead?
Yes. The oven method uses a preheated 375°F oven. The prepared chicken is baked for approximately 40 to 45 minutes and checked with an instant-read thermometer until it reaches 160°F. Rest the chicken for five to ten minutes before serving.
What replaces breadcrumbs in this keto recipe?
Finely ground almond flour and grated Parmesan cheese provide the coating in this recipe. Together, they create a savory exterior while avoiding traditional breadcrumb ingredients. The egg coating helps the almond flour and Parmesan mixture adhere to the chicken.
Can I prepare Chicken Kiev ahead of time?
Yes. The seasoned butter can be prepared and chilled ahead of time, while the assembled chicken can be refrigerated for at least two hours or overnight before cooking. This makes the recipe convenient when you want to prepare dinner in advance.
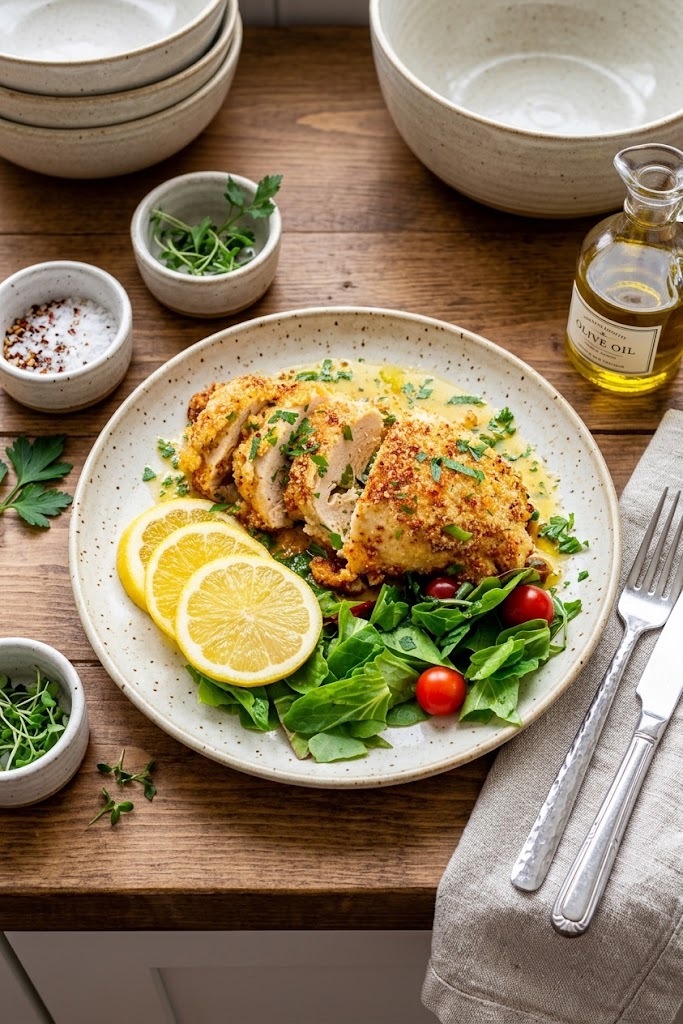
Keto Chicken Kiev – Low Carb and Gluten Free
A low-carb and gluten-free Chicken Kiev featuring tender boneless chicken breast wrapped around seasoned garlic-parsley butter and coated with almond flour, Parmesan cheese, and cayenne pepper.
8
servings30
minutes20
minutes347.79
kcal50
minutesIngredients
1 stick salted butter, softened
2 tablespoons chopped fresh parsley
1 teaspoon minced garlic
1 teaspoon sea salt
½ teaspoon ground black pepper
2 pounds boneless chicken breast
¾ cup finely ground almond flour
¾ cup grated Parmesan cheese
⅛ teaspoon cayenne pepper
2 eggs, beaten
Directions
- Prepare the Garlic Butter
- Add the softened salted butter, chopped parsley, minced garlic, sea salt, and ground black pepper to a medium bowl.
- Mix until the ingredients are evenly incorporated.
- Shape the seasoned butter into a log.
- Wrap it securely in parchment paper, waxed paper, or plastic wrap.
- Refrigerate for at least 2 hours, or until firm.
- Prepare and Fill the Chicken
- Place the chicken breasts inside a zip-top bag.
- Pound each breast with a meat mallet until approximately ¼ inch thick.
- Place the chilled butter in the center of each chicken breast.
- Roll the chicken tightly from the long side while tucking the short sides inward.
- Secure each chicken roll with toothpicks.
- Wrap the prepared chicken tightly with plastic wrap.
- Refrigerate for at least 2 hours or overnight.
- Make the Coating
- In a shallow bowl, combine the finely ground almond flour, Parmesan cheese, and cayenne pepper.
- Place the beaten eggs in a separate bowl.
- Dip each chicken roll into the beaten eggs.
- Transfer it to the almond flour mixture.
- Use your fingers to press the coating firmly onto the chicken.
- Air Fryer Method
- Preheat the air fryer to 350°F.
- If desired, use an air fryer liner to help prevent sticking.
- Lightly spray the chicken with oil.
- Air fry for approximately 20 minutes.
- Check the thickest portion with an instant-read thermometer and cook until it registers 160°F.
- Remove from the air fryer and let the chicken rest for 5 to 10 minutes.
- Remove the toothpicks before serving.
- Baked Method
- Preheat the oven to 375°F.
- Line a baking sheet with parchment paper.
- Spray the prepared sheet with cooking spray.
- Place the coated chicken onto the baking sheet.
- Lightly spray the chicken with oil.
- Bake for approximately 40 to 45 minutes, or until an instant-read thermometer registers 160°F.
- Allow the chicken to rest for 5 to 10 minutes.
- Remove all toothpicks before serving.
Nutrition Facts
- Total number of serves: 1
- Calories: 347.79kcal
- Fat: 33.39g
- Carbohydrates: 2.98g
- Fiber: 1.19g
- Sugar: 0.52g
- Protein: 31.48g
